For the final installment of our Reamp® Academy series, we are taking the opportunity to share some of our favorite tips and tricks in order to get the most out of your Reamping session and workflow. If you’ve been following along throughout the series and have the basics mastered, you can use these tips to open up even more creative options for you to use in the studio (and on stage).
Before we dive in, if you are new to Reamping and are interested in finding out what it is, how to do it, and how to set up your DAW for a Reamping session, be sure to check out the previous entries in our Reamping 101 series.
Tweaking your Tracks before Reamping
While Reamping allows you to play back a previously recorded track and tweak the recording options as much as you like (mic & preamp choice, mic placement, amp choice, amp settings), it can be easy to forget that you can combine this with subtle or drastic tweaks in your DAW as well. Just because you might be using a dry DI track for playback doesn’t limit you to sticking with that track as-is.
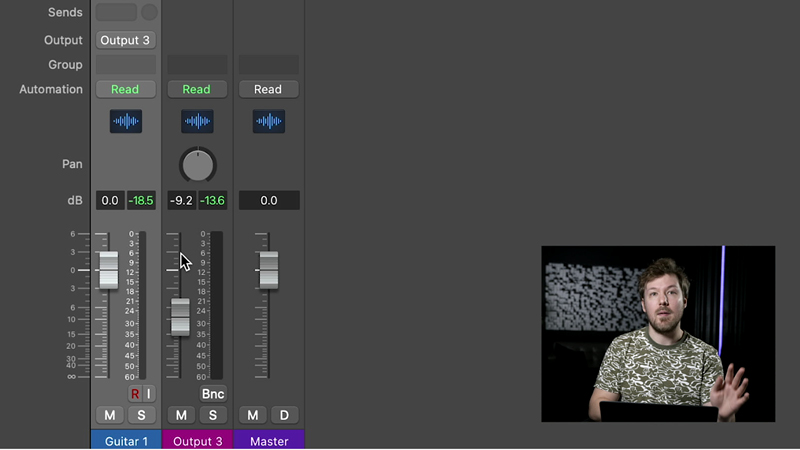
First off, while setting your output levels is an important part of Reamping to begin with (see our previous Reamp® series posts for more details), you can play with different output level settings on your playback track to see how that affects the tone through your amplifier. Bringing up the output level to push the tubes in the amp can round out the tone and cause more breakup that might suit your mix.
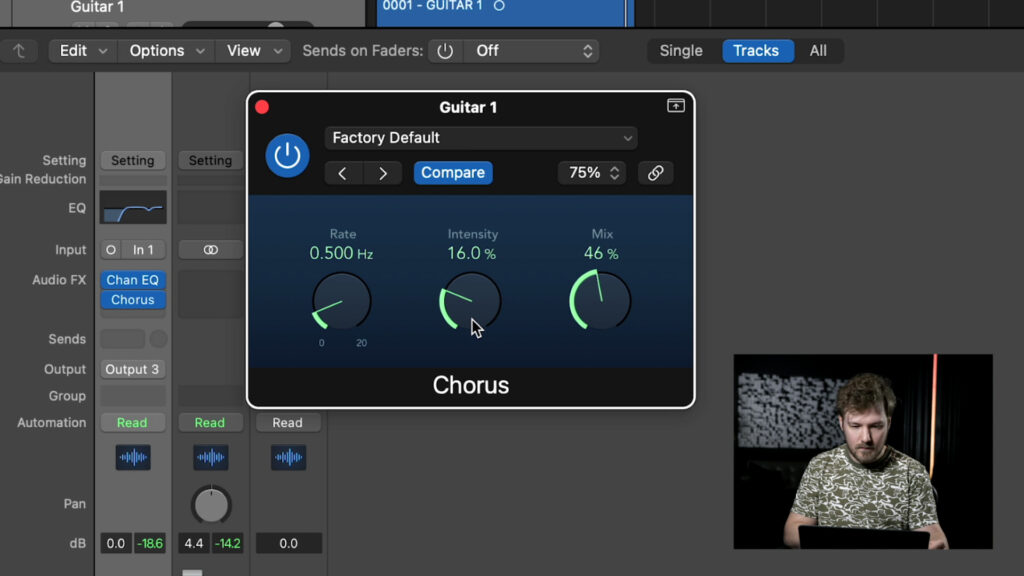
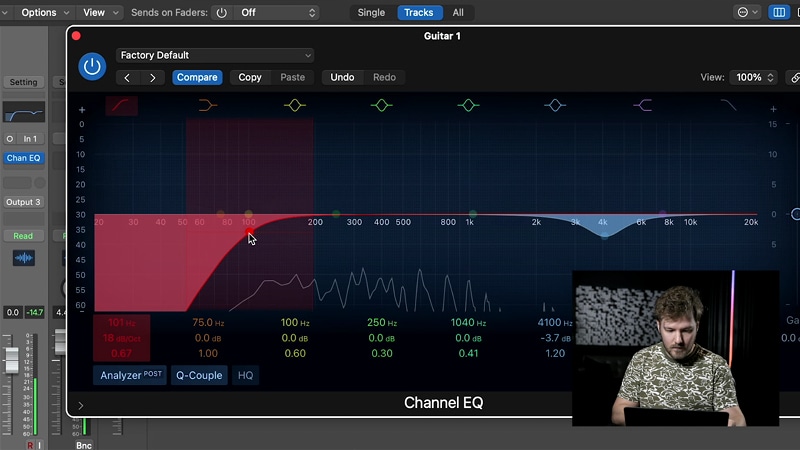
Using other audio effects on your track is also a useful option, since you may have dozens if not hundreds of plugins already to experiment with and shape the guitar tone before it ever reaches the amplifier. Often times just using an EQ plugin to pull out a few decibels of 3-4kHz from your DI track can tame a brittle tone and remove excess harshness before Reamping, saving you from having to adjust for this after the fact. Employing a high pass filter is also a common trick to reduce the amount of muddiness of a guitar track, particularly when you are adding distortion via pedals or amp breakup.
For some more excitement from your plugin selection, try a chorus to use it as a replacement for a pedalboard effect, or a high end compressor to even out the sound of the DI track before your bring things into the analog world again through Reamping.
Two Is Better Than One
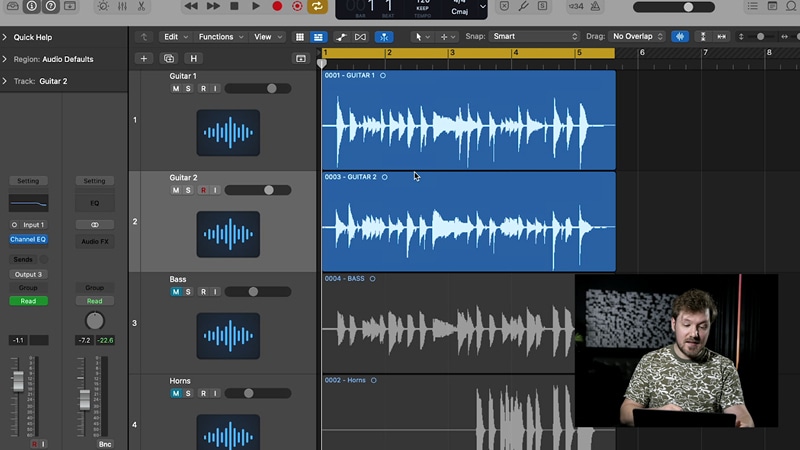
Another trick you can try to add some more ‘glue’ to your mixes is layering multiple tracks in your DAW through the Reamper at the same time. For instance, if you have a double tracked guitar from your recording session, you can feed both passes through the same at simultaneously, giving you an almost chorus-y, thicker sound as a result. This can be particularly helpful if you’re using vintage mic’s or preamps that introduce extra noise to your signal, as you can combine multiple signals into one pass instead of stacking Reamp® tracks and multiplying the added noise from your gear.
Experimenting with adding extra tracks along with your guitar can also create a unique effect that can sound as if you’ve grabbed a vintage sample from deep within a record crate. Check out the video accompanying this blog, for an audio example where horns and bass are layered into a guitar DI track and Reamped together, producing a really cool sonic footprint.
There’s no limit to what you can try with Reamping, so try and do something new with each Reamping session just to try it, you never know what might click for a certain song. You might even find your next ‘go-to’ secret weapon that you keep coming back to again and again.
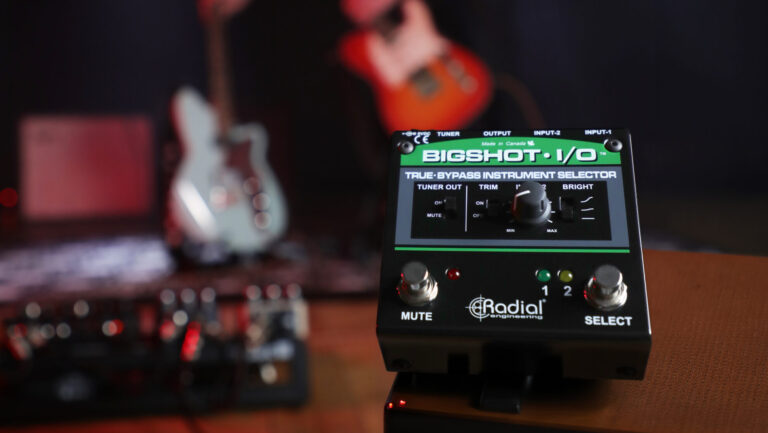
Reamping Your Wireless System on Stage
Using a wireless guitar system is a great addition to any live performance, but the freedom these devices provide sometimes come with a hidden cost to your guitar tone. Often times the balanced outputs of a wireless receiver can cause an impedance and output level mismatch when you interface them with your pedalboard and amplifier. This can sap the tone that you’ve worked hard to achieve and leaving you with a different sound that you’re used to when hard- wired to your pedals.
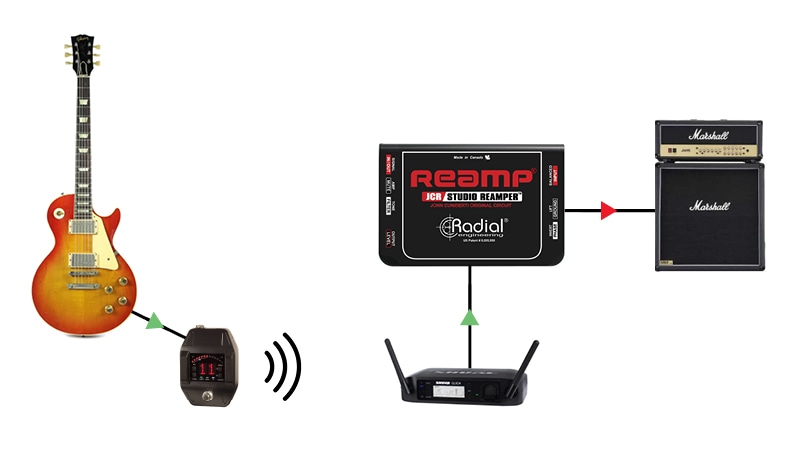
Since most wireless receivers will have a balanced, low impedance line-level output much like an audio interface, this is a perfect place to insert a Reamp® box to properly interface with your amp and pedals while retaining the original tone of your instrument. Simply place a ProRMP (or better yet, the Reamp® JCR as it has a locking XLR input that won’t accidentally disconnect on stage) between the line output of your receiver and the next point in your signal path. Then simply adjust your levels to match what you’d get with a direct cable connection, and enjoy a much improved sound through your wireless rig.
This brings us to the end of our Reamping 101 series, thanks for reading and watching the accompanying video tutorials. Hopefully this has left you with a better understanding of what the Reamping process involves, and how to apply setup and workflow techniques to get the most out of this powerful studio and mixing tool. If you have suggestions about other topics you’d like us to explore in a similar in-depth approach, feel free to reach out and let us know. Until then, have fun with your music and happy tweaking.