If you are a newcomer to Reamping in the studio, one question you likely have is how to set up your Digital Audio Workstation (DAW) for best results. While our previous Reamp® Academy post focused on the steps involved in the Reamping process, this entry will walk you through how to setup and route your tracks with some of the most popular DAWs (Logic Pro, Ableton, Cubase, and ProTools) so you can have a smooth and successful Reamping session.

The equipment we used for the example Reamping session included a Macbook Pro and an Apollo Twin as the audio interface, but the steps described can be replicated using any interface and computer.
Step 1. Prepare your dry track for Reamping
The best place to start when Reamping is with your prerecorded audio source track, which is typically a guitar or bass captured through a high quality direct box. This is called your ‘dry’ track or ‘direct’ track since it’s a tap right from the instrument itself, and it typically hasn’t been run through any pedal effects or an amplifier. Our goal with this track is to get it out of the DAW and into our amp and effects, so we will need to route the output accordingly and provide a good strong signal level to feed our Reamp® device.
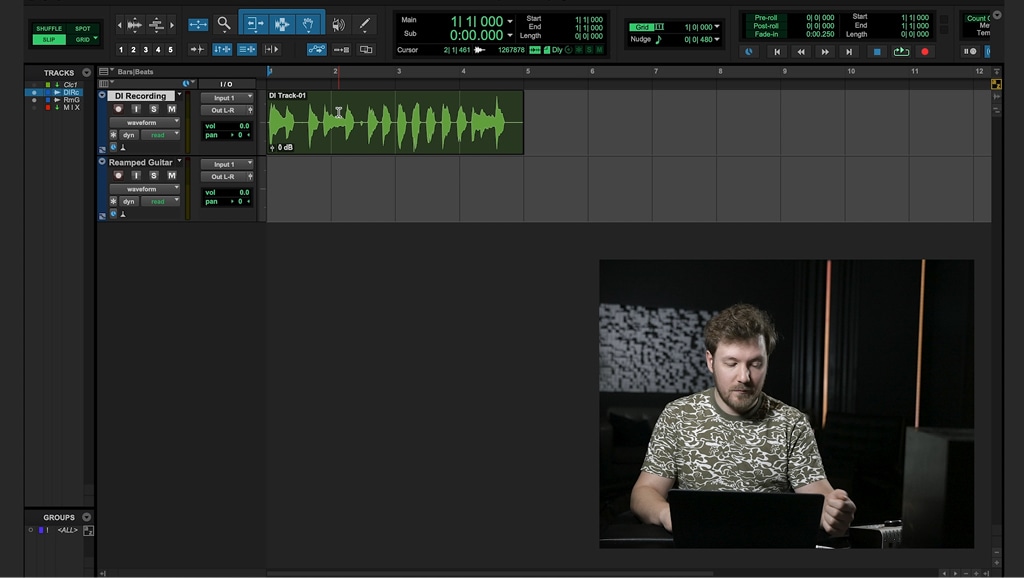
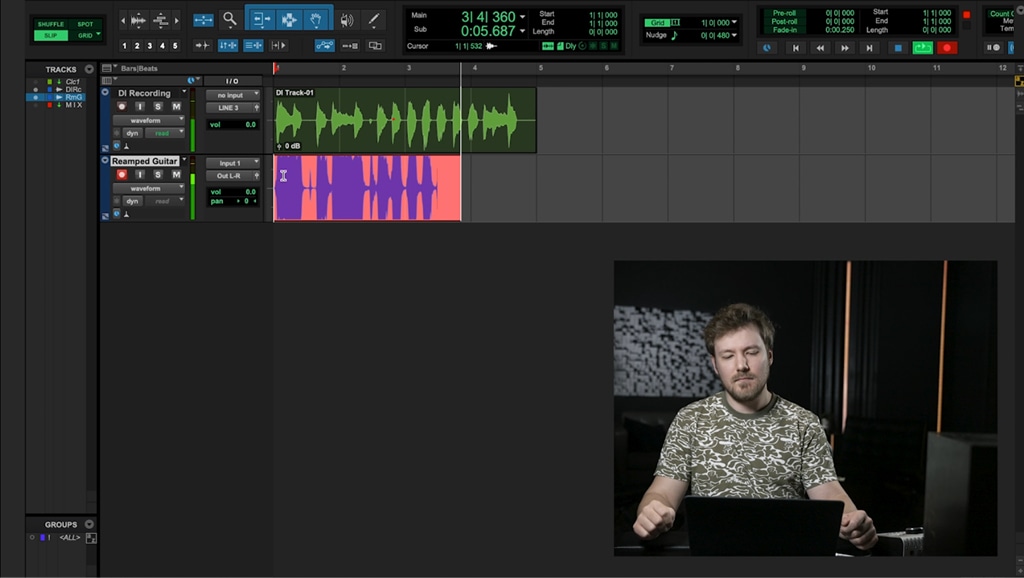
Begin by starting playback and noting how much signal is present on the output meter for your dry track. You want as much signal level as possible for the best signal-to-noise ratio, so bring up the level control on this channel until you are getting as much signal out of the track as possible without clipping or ‘going into the red.’ You can always turn the level down later using the Reamp® box if needed, but it will be difficult to add more gain during later stages without also increasing your noise floor. The next thing you’ll want to do is assign the output of your track to an unused line out on your audio interface. On the Apollo Twin outputs 1 and 2 will usually feed your studio monitors, so we will select ‘LINE OUT 3’ (see figure 1).
Out of the box connections: At this point, if you haven’t done so already you will want to connect Line Out 3 from the interface to the input of your Reamp® device of choice, using a balanced TRS or XLR cable (see figure 2). Then the output of the Reamper will connect to your pedals and amplifier using an unbalanced TS instrument cable (see figure 3).
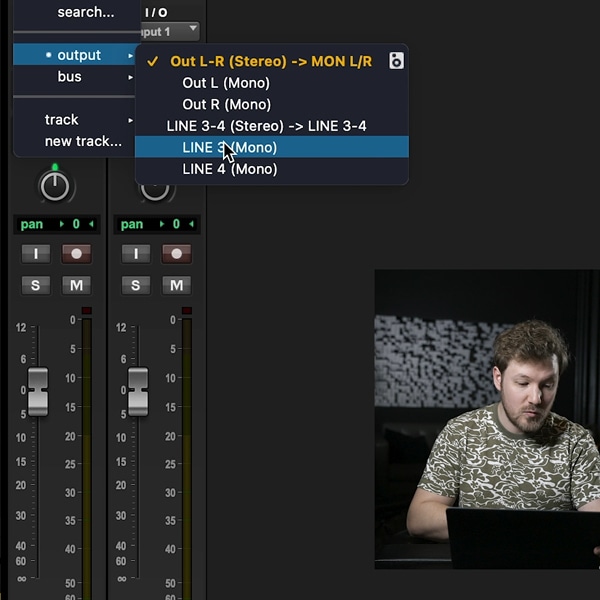 Figure 1
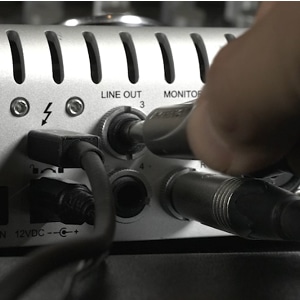 Figure 2
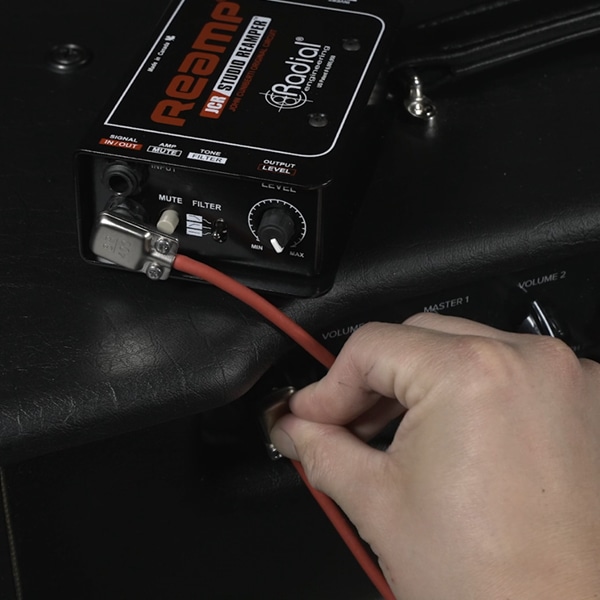 Figure 3
Testing your setup so far: Before moving forward, you can do a quick test to ensure that you’ve got things connected and routed correctly so far. Solo your dry track, and turn on your amp (It’s a good idea to start with the levels turned low on your Reamp® device and your amplifier to start with – you can bring the levels up once you’re confirmed you have good signal passing through). Then hit play on your DAW; if things are configured correctly, the dry track will pass through its own output on the audio interface, which will feed the Reamper and in turn your amplifier. Once you’ve got this far it will sound as though there is a guitar connected directly to your amp, and now you can tweak your pedal and amp settings as much as you like while retaining the original performance (and saving your guitarist’s fingers from fatigue), which is the beauty of Reamping in a nutshell.
2. Create your record track to capture the results of your Reamp® setup
With most of the hard work already complete, you’ll just need to create a new mono track in your DAW to record the fruits of your labor. This track will record the output of a microphone that you place on your amplifier to capture your Reamped audio signal. Start by creating a new audio track, and assign the output to your main stereo mix. Make sure you do not assign the output of this track to the same Line Out 3 as you did with your dry track – this would cause a feedback loop the moment this track is activated. For the input of your record track, set it to any available mic input on your audio interface. In our example we have nothing else connected to the Apollo Twin so we are using ‘MIC INPUT 1” (see figure 4). Note that for this Reamping session we are using a simple setup that just has one microphone placed on the amp, but it’s common to use multiple mic’s on the same amp simultaneously and blend the signals together. If you’re using a multi-mic setup, simply repeat this process for each additional microphone.
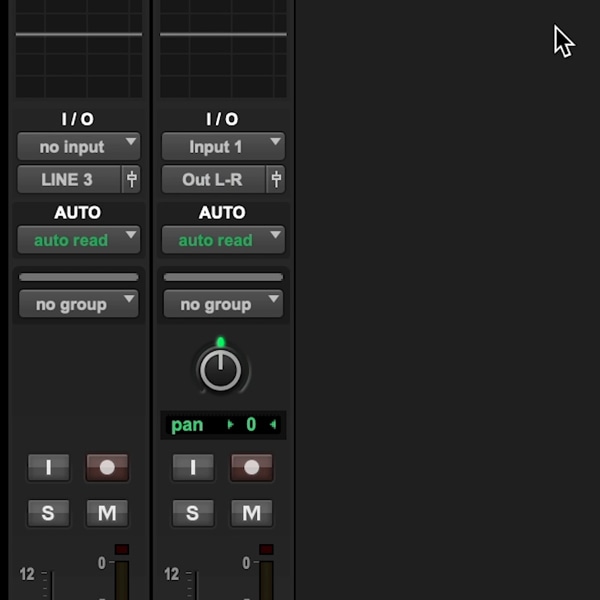 Figure 4
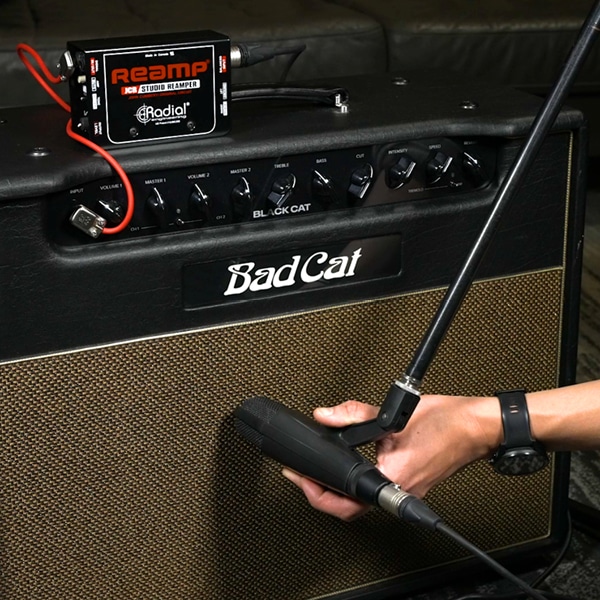 Figure 5
Out of the box connections: Take your handy SM57 or whichever mic you choose and position it in front of the amplifier, then use an XLR cable to connect to Mic Input 1 on the audio interface (see figure 5) (we told you the hard work was already done).
3. Putting it all together
Just before you enable your record track, it is worth pausing to consider where the amplifier is placed in relation to your listening position in the studio. If you have the benefit of an iso booth or a live room where you can place your amplifier so it’s not audible from your listening position, then it’s time to hit record and let it rip! However, if your amplifier is in the same room as you, which is not uncommon in a home studio environment, then you’ll want to first turn down your monitors and switch to headphones while recording your Reamp® tracks. This is to prevent any chance of a feedback loop occurring while also eliminating the chance of bleed from the rest of your mix onto your Reamp® audio track. Once you’ve finished a round of recording, you can switch back to your studio monitors to check how your Reamp® tracks are sounding and fitting in with your mix, and then tweak and experiment as much as you like.
Now that you’ve got the details down and have run your first Reamp® session, keep an eye out for the next part in our Reamp® 101 series where we explain how you can incorporate guitar pedals into your signal chain and even use them as if they were outboard studio effects processors. Until then, happy tweaking!