For our first entry of Radial’s Reamp® Academy series, we looked at what the process of Reamping was, and how it could impact your mixes by allowing you to shape your guitar tone after the recording process has already taken place. Gone are the days of listening back to your tracks the next day and wishing you used a different amp or mic’d the cab differently: Reamping gives you the freedom to experiment and create long after the guitarist has left the session.
For part 2, we will dig into the standard workflow for capturing your guitar and bass tones using a Reamper in the studio.
The basic Reamping workflow is a 3 step process:
● Record your dry unprocessed guitar tone into your DAW
● Send the finished takes to your guitar rig, and
● Re-capture the sound of your unprocessed guitar tracks through your pedals and amplifier
So let’s break down each step and describe how it’s done.
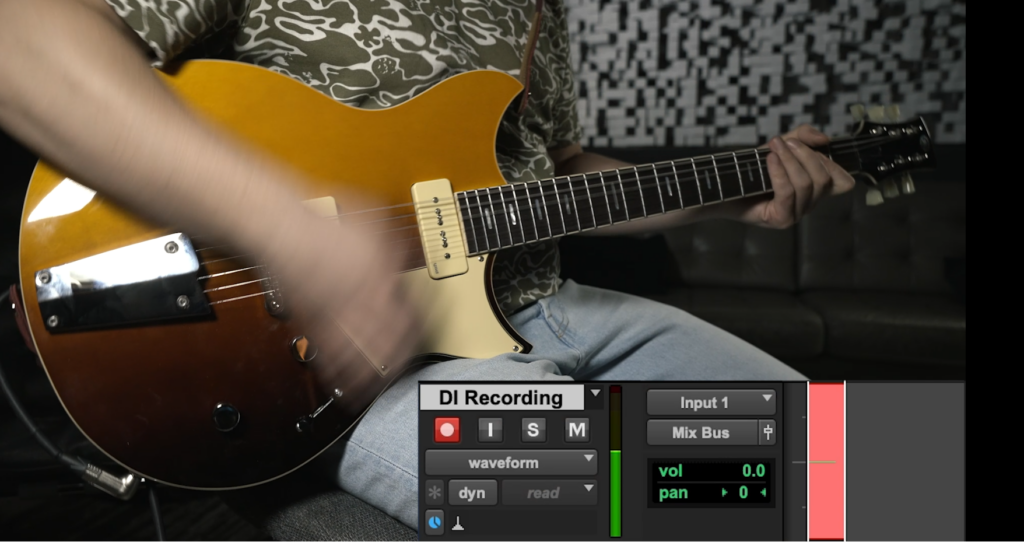
Step 1:
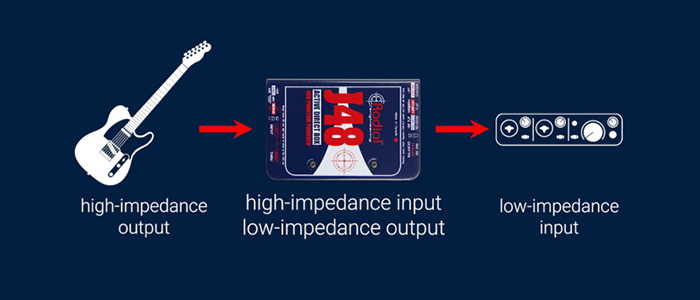
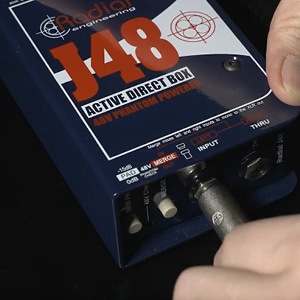 Figure 1
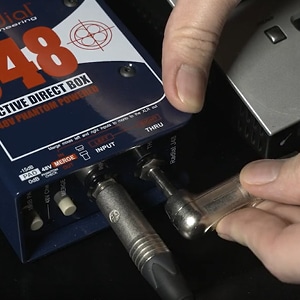 Figure 2
To start, plug the guitar directly into your audio interface via a DI box (see figure 1). The DI box converts the guitar’s hi-impedance output to a low-impedance, mic-level signal that provides the best fidelity for your interface’s mic preamps. After that, you can start recording your guitar directly into your DAW. If you want to monitor your tone with a guitar amp during tracking, you can plug your monitoring guitar rig into your DI’s THRU output (see figure 2). Because we are only recording the dry sound here, you can really focus on getting the guitar performance perfect instead of worrying about your guitar tone. Note that you can also record the output of your amplifier at this time the same way we describe later in step 3. Even if your mic placement or amp settings aren’t perfect, this will give the engineer and the artist a much better sense of how the finished track is going to sound when listening back to each take.
Step 2:

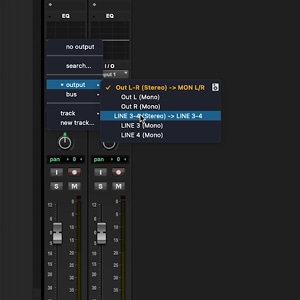 Figure 3
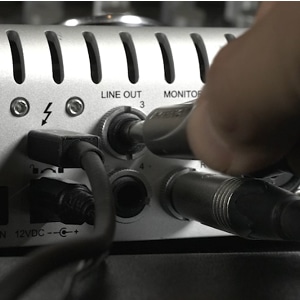 Figure 4a
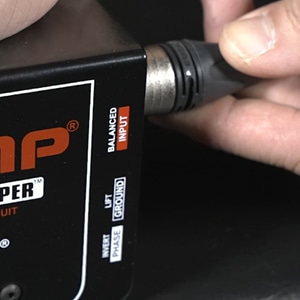 Figure 4b
After you’ve recorded the performance you are happy with (or once you have edited together a comp to create a final take), assign the recorded DI track in your DAW to one of your interface’s outputs (see figure 3). Then connect the line-level output of the interface to the input of a Reamp® box (see figure 4a & figure 4b). If your interface doesn’t have a dedicated output to send your tracks to, you can actually use a specialized Reamp® box like the Radial Reamp HP to Reamp® your tracks via your interface’s Headphone Jack instead.
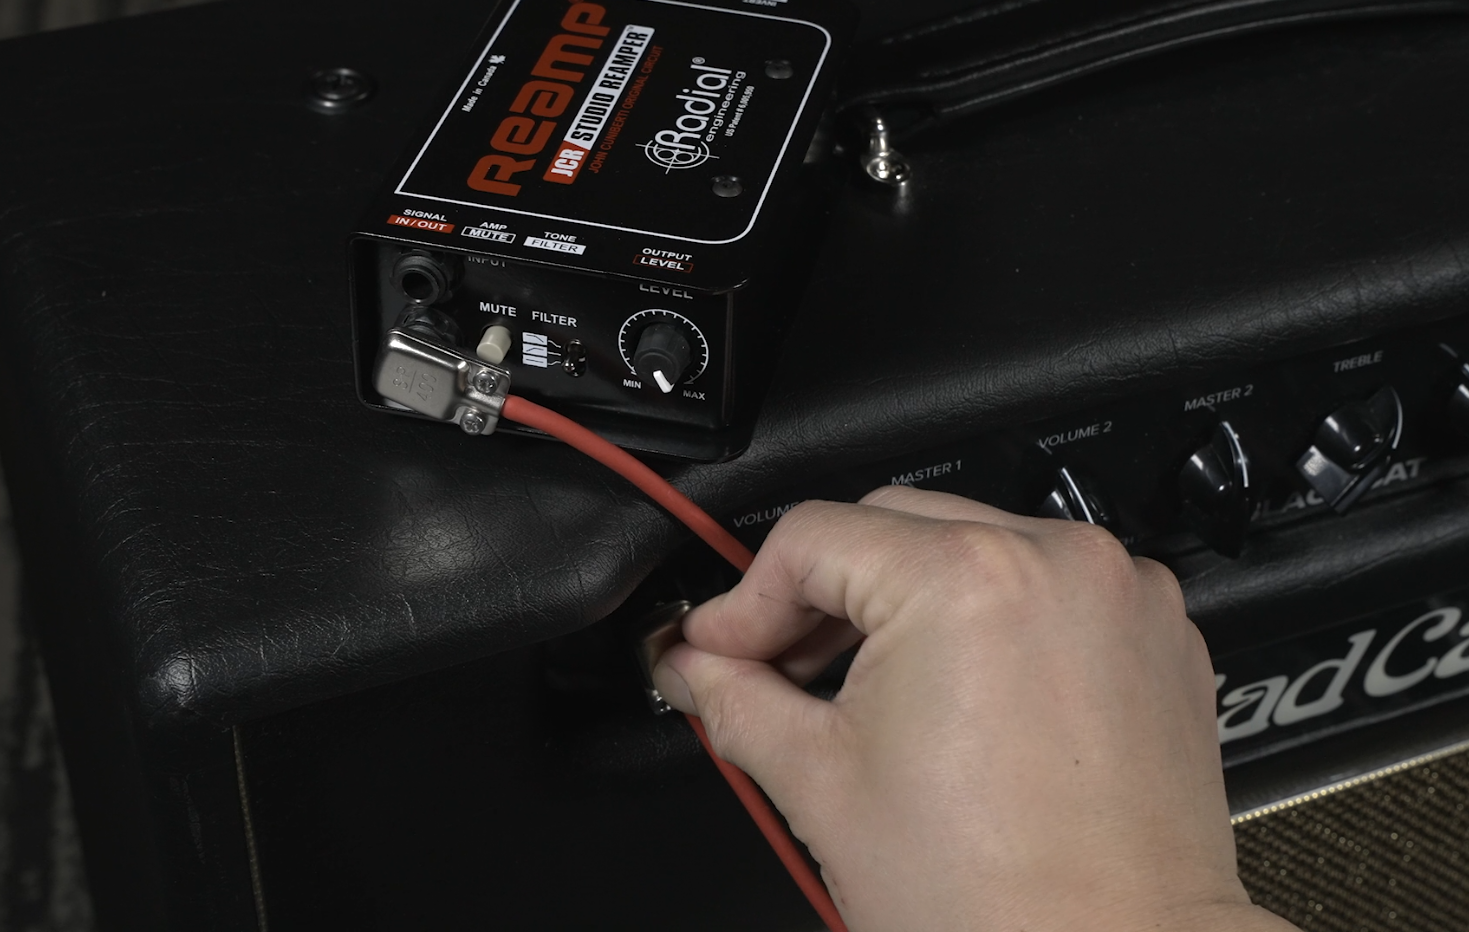
Figure 5
Once you have the Reamp® box connected to your interface, the output of the Reamper can connect to your guitar rig using a regular 1⁄4″ instrument patch cable (see figure 5). You can connect directly to an amplifier if you wish, or to your pedalboard first to add any desired effects before the amp. This is where you can start experimenting with different cabs, effects pedals, and amp setups. Because a Reamp® box converts the lo-impedance signal coming out of your interface into an instrument appropriate hi-impedance signal, your guitar equipment will react with much of the same detail and dynamics as it would if you were plugging a real guitar directly into it.
Before moving on to the next step, hit playback on your audio interface and have a listen to ensure you’re hearing the recorded track through your amplifier. Adjust the volume control on your Reamper and bring up the level in your DAW if necessary to get the same output from your amp as if the guitar were directly connected to it.
Step 3:
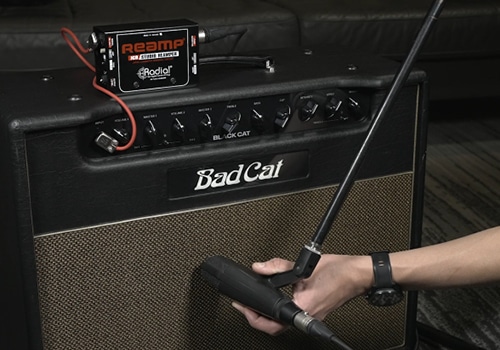 Figure 6
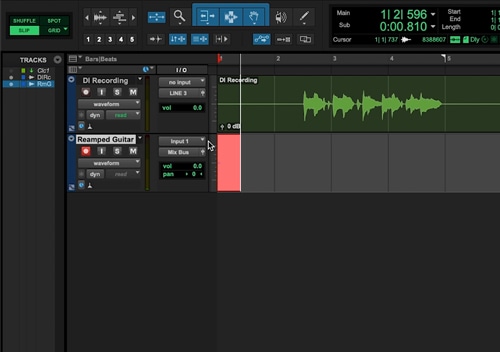 Figure 7
This is where you complete the Reamping process by mic’ing up your new rig (see figure 6) and pressing record on your DAW. As your interface sends your dry guitar tracks to your amp and pedals, it will also be recording your newly created amp tracks at the same time (see figure 7). Before recording, make sure to create a new track in your DAW to capture the signal from your microphone, and set the output of this track to the stereo bus (or any channel other than the output you are using to feed the Reamp® box). Check out part two of our Reamp® Academy video series for a direct comparison between the original and Reamped tracks that really shows the difference that a Reamping a track can make.
Here are a couple extra tips to help you get the most out of your Reamping setup. First, get the output level of your direct track as high as you can (without clipping) when you send it out of your interface and into your Reamp® box. Also don’t be afraid to add some of your DAW’s effects like EQ or limiting when sending out your signal as well. Lastly, if you find yourself Reamping a lot, instead of having a separate DI and Reamp® box, you can get a two-in-one unit like our Reamp® station.
That covers the basics of a typical Reamping setup, and as you can see it only takes a few simple steps to incorporate this extremely useful process into your workflow. For our next installment, we will dig into the specific settings needed for each of the most popular DAWs so you can follow along and ensure a flawless Reamping session.